November 16, 2023
3 Tips to Take Better Photos on Your Phone
 Written By Alyson Carr
You don’t have to be a professional photographer to take photos that not only look great but are worthy to put in front of your customers. There are a few simple tips that you can implement today that will help you take better photos.
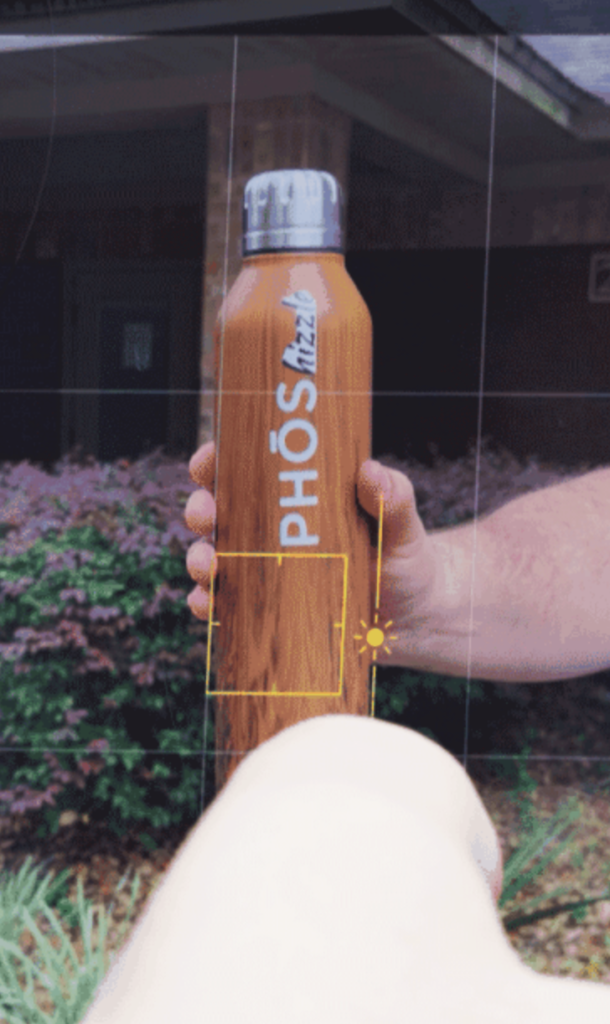
Tip #1: Manually Adjust the Exposure
Your iPhone automatically adjusts its focus and exposure for you. However, there are scenarios where drastic lighting or a busy scene make it best practice to manually adjust the settings yourself. Our phones are smart but not as smart as we think they are.
Our phones don’t actually know what we are taking a picture of, so its default settings try to adjust the exposure for the entire image. This results in an evenly lit image that lacks focus or emphasis on a single subject. When adjusting the exposure manually, make sure you are tapping on the subject first then dragging the exposure to the level that feels appropriate or closest to real life.
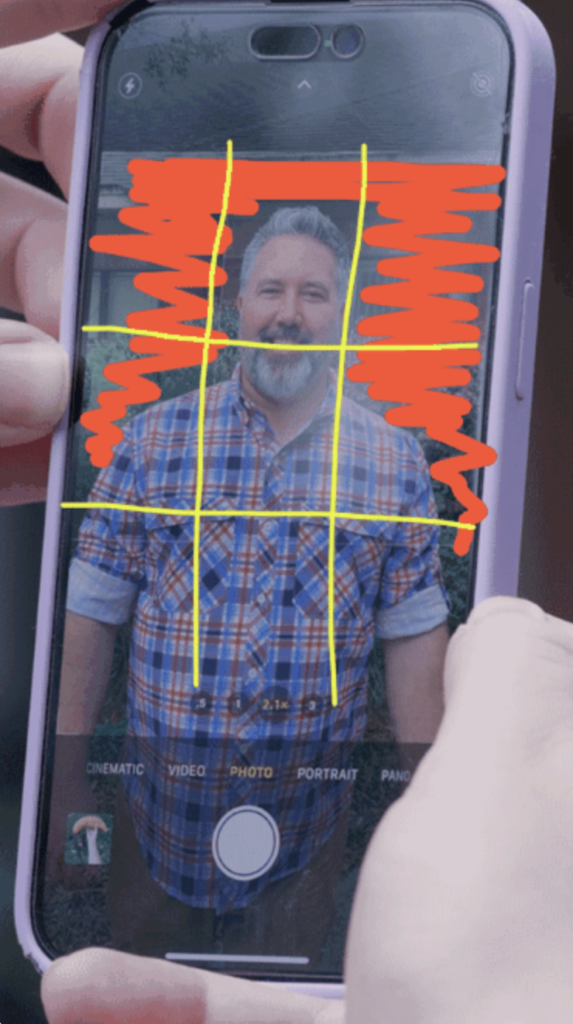
Tip #2: Head Space & the Rule of Thirds
Our brains are naturally drawn to balance and symmetry. So when capturing a picture, it is important to consider these in your composition. In most cases, there should be a balance between the subject and the space around it.
Too much space can make the subject look smaller than life and evoke an emotion of solitude, emptiness, or inferiority. Too little space around a subject can make the image feel cramped, crowded, and suffocating.
The Rule of Thirds is a “rule of thumb” used for composing images, and it is used by photographers, painters, and filmmakers. It consists of imaginary quadrants that place your subject in either the left or right third of the image leaving two-thirds as space. There is a grid that can be turned on in your iPhone’s camera settings that acts as a guide. When taking someone’s portrait, consider positioning their head in the upper third portion of the frame, leaving a little breathing room above and to the side of them. This allows your subject to sit comfortably within the frame. This works for both vertical and horizontal pictures.
Additional tip: Center your subject if you want to convey a subject that is still or stoic. This works great for product photography or business headshots. Make sure the subject is perfectly centered and that the frame is not tilted in one direction or another.
Tip #3: Editing
Not all photos look their best right after you take them. Editing a photo gives you the power to adjust nearly every aspect of the photo after the fact. You can fix improper exposure or colors and even create adjustments that cause the photo to portray a message or evoke an emotion.
Your iPhone has many wonderful editing tools. We recommend, however, avoiding using its filter presets when adjusting the colors of your photo. These filters are well-known among users and end up making images look cliche or amateur. Instead, familiarize yourself with iPhone’s photo editing tools to craft your own adjustments.
Use the exposure tool to adjust a photo’s brightness, or change the temperature setting if the photo looks too cold or too warm. I often add a bit of contrast to my images that make the colors a little more vibrant and exaggerate the shadows and highlights just enough to make the image full of life. Less is usually more, so avoid pushing these settings to the max.
Additional tip: There are other fantastic photo editing apps that I think do a better job or are easier to use. One of my favorites is VSCO. You can download this app for free. However, if you want full editing abilities, a subscription is needed.
Level Up Your Photography with PHOS
By following these three tips, you’ll be able to improve your photo-taking abilities by being more intentional with exposure, composition, and editing decisions. Whether you have a top-tier, professional camera or just an iPhone, these simple but powerful tools will help you take photographs that look less amateur and more appropriate for professional use. Remember, practice makes perfect, and in no time, you’ll be able to take beautiful photos anytime and anywhere!
Though iPhones are an exceptional tool and great for taking photographs in a pinch, having professional photos to represent your business is a great asset to have. If you are looking for high-quality photographs taken by a professional, PHOS is here to help—with more than just an iPhone camera.
Alyson Carr
Having taken every art class she could since she was a kid, Alyson pairs her multifaceted creative experience with her unique perspective to craft compelling visuals that serve our clients best. As a Creative Media Associate, you’ll find her on location taking photos or behind a computer color-grading and making our clients look like rock stars.
Aside from her role at PHOS, you’ll find this Florida native outdoors soaking up some sun, playing golf with her husband, or walking her dog, Tucker.